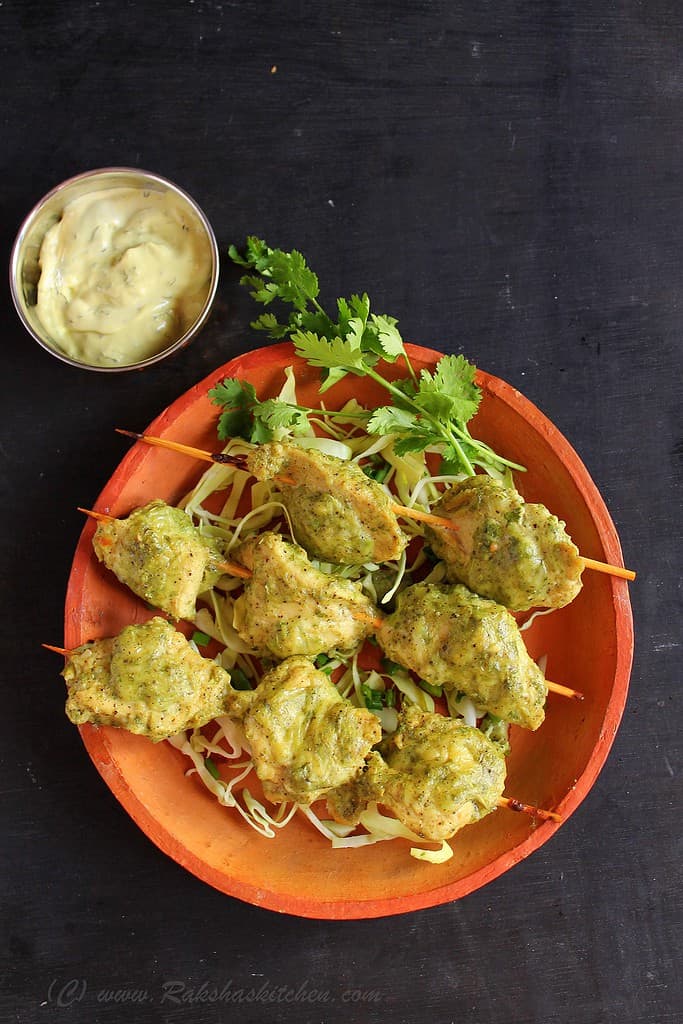
Murg Malai Kebab or Reshmi Kebab are melt in mouth chicken kebabs. These are made with cheese, cream, thick yogurt and spices. These are served as appetizers.
Murg Malai Kebab or Reshmi Kebabs belongs to Mughlai cuisine. These are normally served as starters in restaurants. These melt in mouth cheesy chicken kebabs are made with cheese, cream, thick yogurt and spices.
Traditionally these chicken malai kebabs are made in tandoor over charcoal. I did not have a tandoor with charcoal, so I made them in oven. You can make them in the same way too. If you are interested in chicken recipes, you can try them now.
These chicken kebabs are also known as creamy chicken skewers. In this recipe chicken is marinated twice, first with ginger garlic paste and black pepper powder and 2nd time, it is marinated with mozarella cheese, fresh cream, yogurt and spices. Marinated chicken is added to skewers and it is then grilled till cooked properly.
Also try: Chicken tikka kebab, Tava chicken fry, Rava fried chicken
Serve these murg malai kebabs for parties as starters. Prepare the marinade and apply to chicken and keep it in fridge. Just before the party, grill or broil. It gets grilled in just 20 minutes. Serve these kebabs hot with mint/pudina chutney and shredded cabbage. Serve these kebabs as a side dish with chicken biryani.
Murg Malai Kebab
Ingredients
- 300 gram boneless chicken breast/2 boneless chicken breasts
For the 1st Marination:
- 2 tablespoon ginger garlic paste
- 2 teaspoon black pepper powder
- 1 tablespoon lemon juice
- 1/2 tablespoon salt
For the 2nd Marination:
- 3 tablespoon grated mozzarella cheese
- 1 tablespoon corn flour
- 2 garlic pods
- 2 green chillies
- 4 tablespoon chopped Coriander leaves
- 2 cardamom pods peeled and crushed
- 1 tablespoon garlic powder
- 2 tablespoon fresh cream
- 2 tablespoon thick yogurt
- 2 tablespoon oil
- To taste salt
- 2 tablespoon butter melted
Instructions
- Wash the chicken pieces. Cut them into bite sized pieces.
- Marinate the chicken pieces by applying the ingredients mentioned in 1st marinade. (Namely black pepper powder,ginger garlic paste, lemon juice and salt.)
- Refrigerate for 30 minutes.
- Add coriander leaves, green chillies and garlic pods to a mixer and make a thin paste.Do not add water while making the paste.
- To a mixing bowl add thick yogurt, fresh cream, grated cheese, crushed cardamom, garlic powder, coriander and green chilli paste from mixer, corn flour and oil. Mix well.
- Pour this cheesy creamy marinade on the chicken pieces ensuring that the chicken pieces are completely covered. Add salt to taste and mix well.
- Again keep the chicken coated with creamy cheesy marinade in refrigerator for atleast 2 hours.
- Meanwhile soak the skewers in water for 2 hours. This can be done while chicken is getting marinated.
- After 2 hours, start piercing the chicken pieces and putting them on skewers. Ensure that maximum meat is on the upper side of the skewer.
- You can add 2 to 3 chicken pieces on the skewers depending on the size of the kebabs.
- Pre-heat the oven in broil more for 10 minutes at 230 C.
- Line the baking tray with aluminium foil and place the chicken loaded skewers on the baking tray. Keep enough space in between them.
- Apply melted butter on the chicken pieces using a basting brush.
- Place the baking tray inside the oven and broil for 15 minutes at 230 C.
- After 15 minutes, take out the baking tray carefully and flip the chicken pieces.
- Again apply butter using a basting brush and broil the chicken at same temperature for 10 minutes.
Notes
Follow us on Facebook, Twitter, Instagram and Pinterest.
Pin this image on Pinterest. If you like the recipe, please comment and give us a 5 star rating. This post might contain affiliate links.
Note: This recipe was published on 07 Jan 2017 and is republished with pinterest image.


Leave a Reply